
News

We are in the process of updating the website and if you want to order anything please contact us before doing so.

Goblinshead
Cockenzie House
22 Edinburgh Road
Cockenzie
EH32 OHY
Email: info@goblinshead.co.uk
Or use our contact form.

Prices include postage to mainland UK
If you have any comments, praise or suggestions for improvements, please contact us at info@goblinshead.co. uk

Bogles

Castles of Scotland

400+ castles of Scotland with hundreds of illustrations and much much more…

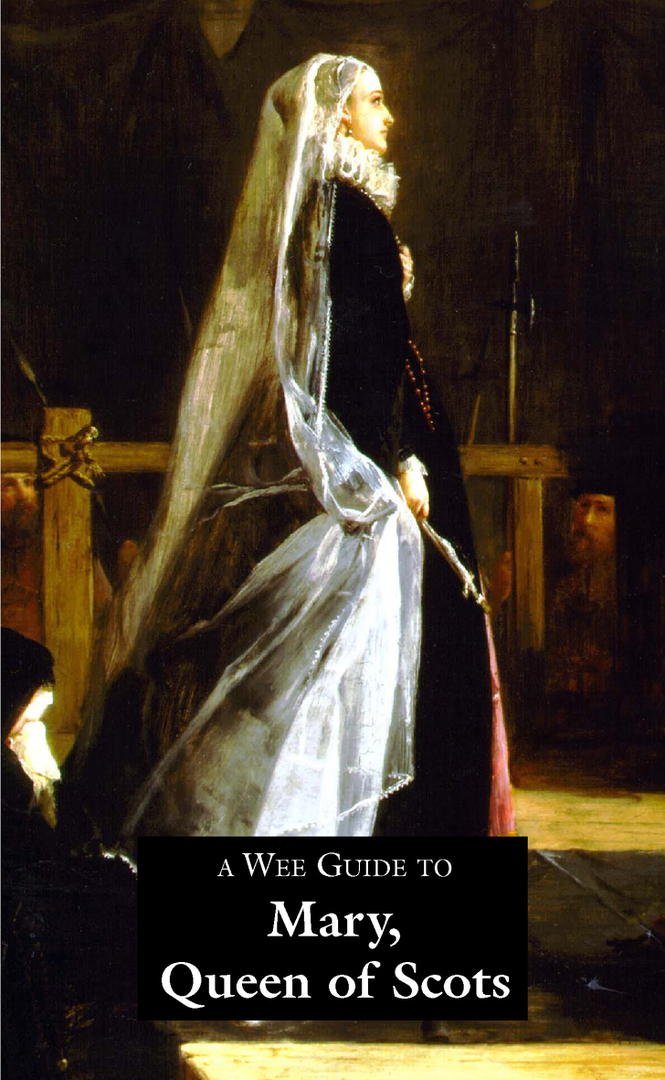
Mary Queen of Scots: Bothwell and Battles
There have been many theories about Darnley’s murder – from the motives behind it, to who was involved, how many plots there were and also how the assassination was
carried out. It is likely that Bothwell was involved, as were others of Mary’s nobles – Maitland, Morton and Moray, and that the discussions at Craigmillar were certainly associated with the plot. It
is also possible, as some have suggested, that it was hoped that the murder would be blamed on both Mary and Bothwell. The truth may always prove elusive, but it does seem that there may have been
more than one group involved and
more than one plan afoot that night. The outcome was still the same – Darnley was dead – and if Mary had previously thought it would be convenient to be rid of him, she was to be proved very wrong.
Mary’s actions from this time on were not those of an experienced and effective ruler, and she began to make some of her least successful and most ill-judged decisions.
Acting as custom demanded, Mary immediately went into mourning, but she did not remain in Edinburgh, instead she went to Seton Castle in East Lothian, home of Lord Seton. Prince
James was left in the care of Huntly and Bothwell. During this time numerous placards appeared in Edinburgh linking her with Bothwell. The images on the placards were those of a hare surrounded by a
circle of daggers, and of a mermaid wearing a crown. The meaning may be obscure to twentieth-century audiences but to sixteenth-century society the meaning was very clear – Bothwell’s family crest
included a hare and the swords implied he was a murderer; a mermaid commonly symbolised a prostitute but the addition of a crown left her identity in no doubt.
Mary came to Bothwell’s defence and continued to consult him openly for advice, and she would not agree to a trial for the murder of her husband. It was Darnley’s father, the Earl
of Lennox who openly accused Bothwell of murder, and the privy council set 12 April as the date for the trial. Bothwell managed to fill Edinburgh with his own supporters, so much so that Lennox was
afraid to come to the city. The trial was held at the Tolbooth but, with Lennox absent, the prosecution had no witnesses or case, and so Bothwell was acquitted.
On 19 April Mary attended parliament and formally took the reformed church under her protection. She also ratified gifts to Lethington, Morton, Moray, Lord Robert Stewart, Huntly
and Bothwell. These actions may have been attempts to ensure support from the most powerful nobles in the country. Bothwell also organized his own personal support from bishops, earls and lords. The
Ainslie Tavern Bond was an agreement to support Bothwell’s claim to marry Mary and to provide him with armed support if need be. The bond had 29 signatories including Morton, Lethington, Argyll and
Huntly, four of the most powerful men in Scotland apart from Bothwell. Again the ulterior motives for these actions are unclear – Bothwell may have had some powerful influence over them to persuade
them that he was a suitable third husband or, in keeping with the duplicitous behaviour of the time, these nobles may have thought the plan would ruin both Mary and Bothwell. It must be said that
Mary herself appears to have refused Bothwell’s proposal several times, perhaps because she anticipated the consequences. Also before any wedding could be officially sanctioned, there was the minor
detail of Bothwell’s present wife.
Mary went to Stirling for a short visit to the young prince on 24 April and planned to return to Edinburgh via Linlithgow. It was here that Bothwell and his small army intercepted
the royal party, which then travelled straight to Dunbar. Mary may have gone unwillingly or by choice, but by their return to Edinburgh on 6 May, after staying at Hailes Castle in East Lothian, a
wedding was inevitable. Legend, and contemporary accounts by those present, suggest that it was here that Mary was raped by Bothwell, an action which forced Mary to agree to the wedding.
Once Bothwell’s divorce was obtained on 7 May there were no further obstacles in the way. The plans may have shocked many, but there was little
obvious objection apart from the initial refusal by the Protestant minister of Edinburgh to proclaim their banns. The wedding contract was signed on 14 May and the ceremony took place the next day.
There were several features which marked this day as very different from her previous two weddings. ‘Marry in May and rue the day’ is a popular Scottish saying and for Mary this would turn out to be
particularly apt. The wedding took place at 10 o’clock in the morning and the service was conducted according to Protestant rites. The rest of European royalty regarded Mary’s conduct with surprise
and shock but did, or could do, little to prevent it.
It did not take long for Mary to realize that this marriage was a serious misjudgement. Bothwell may have appeared a suitable husband for a short while, but the political
repercussions of their union started very quickly. Bothwell’s arrogance and lack of manners did little to ensure amicable relations with the rest of Mary’s advisors. Even Mary discovered a less
attractive side to him than previously, as he no longer appeared to give her the respect that as his Queen she was due. Public and private opinion turned against Bothwell, and despite the guarantees
of the Ainslie Tavern Bond a group formed which pledged to free Mary from Bothwell’s grip.
The couple had gone to Borthwick Castle in Midlothian after their wedding and the Confederate Lords assembled an army and marched from Stirling to meet the couple. Mary had few
troops with her, so the couple had to slip out the castle quietly and head for Dunbar, where they hoped to organize their own troops. With the support of
Huntly and Crawford, Mary raised an army and the two forces, of almost equal size, met at Carberry Hill near Musselburgh, near Edinburgh on 15 June. Bothwell, in his usual rash manner, was all for
single combat, but Mary was against this. She also initially refused to agree to the offer that if she would desert Bothwell the lords would restore her to her rightful position.
As the day progressed the armies grew restless and less keen to attack their own countrymen, and many began to abandon their leaders. Mary, at
length, agreed to return to Edinburgh if Bothwell was allowed to go free. She said her farewell to Bothwell and surrendered herself, to be brought in disgrace back to Edinburgh, where she was met not
by cheering, welcoming crowds but by jeers and insults.
Instead of returning to Holyrood Palace, as she had thought, the lords took her to the Lord Provost’s house, where she was kept under guard. From here the increasingly dishevelled
Queen was taken to the Douglas castle on Lochleven, owned by Sir William Douglas, the Earl of Moray’s half-brother. Mary had been told by the lords that they would not permit Bothwell to return to
power. The Earl of Morton signed the warrant for Mary’s imprisonment, where, although confined to the island, she was allowed to wander the grounds. She spent the first fortnight in a state of
collapse – either because of pregnancy or general exhaustion.
It was at Lochleven that Mary finally agreed, on 24 July 1567, to abdicate in favour of her son. She had at first refused to sign or agree to a divorce from Bothwell, but the lords
now had the added evidence of the highly questionable Casket Letters, love letters which suggested that Mary and Bothwell had been having an affair before Darnley’s death. The lords were anxious to
get Mary to sign some agreement, otherwise their actions might be perceived as a rebellion against a rightful monarch. They also needed to establish a stable government to restore calm in the
kingdom. If the Protestant lords did not establish a legal government quickly then Mary might obtain overseas help. As things stood Elizabeth, their most likely ally, rather than expressing pleasure
at the problems of her rival, was extremely distressed that a legitimate monarch had been treated so badly.
Reports state that Mary had a miscarriage at Lochleven, some even that she lost twins. There has also been speculation about what stage the pregnancy had reached. There have also
been questions about the date of conception, and whether or not Mary was pregnant in the January or as a result of the time spent at Dunbar. These questions will probably always remain unanswered,
but she was certainly ill, miscarriage or not, in July. Her weakened state may have contributed to her acceptance of the terms offered. She agreed to resign her crown to her son because she could not
carry out her duties as Queen and she agreed that Moray should be appointed Regent in James’s minority but that Morton and the Confederate Lords would govern the country until he returned. James was
crowned at Stirling Castle, where John Knox preached the sermon and Morton and Lord Home took the oath on James’s behalf.
Bothwell in the meantime had, after he left Mary at Carberry, attempted to rally troops, but he found little support, even in the north-east stronghold of the Gordons. He then
sailed to the northern isles of Orkney and Shetland, and raised a number of pirate ships to support him. When Kirkcaldy of Grange sailed north with armed ships, Bothwell made another hasty retreat to
Norway, where he was eventually imprisoned. For a while King Frederick of Denmark held onto Bothwell in the hope that, in some way, he might be able to obtain the northern isles in return for his
hostage, but by 1573 Bothwell was imprisoned at Dragsholm, where he went insane and died in 1578.
Back in Scotland Moray attempted to establish both political and religious control over the country. The religious acts of 1560 were ratified, much to the satisfaction of the
General Assembly. Politically, Moray re-took Dunbar and Edinburgh, which had been held by the Queen’s supporters, and restored peace in the border areas. Moray’s Regency was not welcomed by all the
nobles, especially the Hamiltons and George Gordon, the fifth Earl of Huntly, whose family title had been restored after forfeiture in 1562, and despite all Moray’s efforts the country was not
united. Mary still had a good amount of ground support which was inspired into action by her dramatic escape from captivity.
During her time on Lochleven, two young members of the Douglas family had become besotted by her and assisted her escape. They procured the keys of the castle, and late on 2 May
1568 Mary crept into a boat and was rowed to the shore where horses were waiting. She then met up with Lord Seton and rode to Niddry Castle near Winchburgh. From here she made her way west, to Cadzow
Castle home of the Hamiltons, where she was pledged support by nine earls, nine bishops, 12 commendators and 18 lords – a mixture of Catholics and Protestants, and also some of those who had attended
Moray’s parliament. The support rapidly increased to 5000 or 6000 men and Mary and her party were optimistic of success.
Moray and his group –the King’s party – had been caught off guard by her escape, and now was the time to strike. Moray was in Glasgow and Mary decided to march towards Dumbarton,
near Glasgow, to try and attack before he got re-inforcements. On 13 May the two armies met at Langside, but despite having a smaller army, Moray’s troops were more experienced and outmanoeuvred the
Queen’s troops. Mary initially tried to rally her troops, but there were personality clashes among her supporters as the Earl of Argyll, whom she had appointed commander, was not a popular
choice.
As defeat became inevitable, she fled the battlefield, accompanied by Lord Herries, and made for Terregles Castle, a Maxwell property, and then Dundrennan Abbey where she called a
meeting with her advisors – Herries, Fleming, Livingston, Boyd and George Douglas. She had decided to ask for help from Elizabeth, whom she felt, as a woman and monarch, would understand her
position. Her advisors thought she should seek help from France – her own, and Scotland’s, traditional ally. Mary could not be persuaded to change her mind, so a message was sent to Sir Richard
Lowther, deputy-governor of Carlisle, asking for safe passage for Mary and her party. Mary also wrote a personal letter to Elizabeth in which she explained her predicament, and without waiting for
confirmation of her safe passage, on 16 May disguised as an ordinary woman she crossed the River Solway and landed at Workington, spending her first night in England at Workington Hall, which was
owned by a friend of Lord Herries.
© Joyce Miller & Martin Coventry 2018